Tuesday, October 9, 2012

Perfect Box Pouch


http://modernquiltlove.wordpress.com/2009/07/14/perfect-box-pouch-tutorial/canonjuly09 115
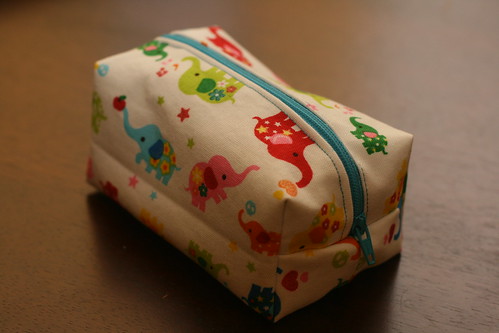
How insanely fabulous is this pouch? I can’t decide if I love it so much because a) it is made from glittery elephant fabric, b) of it’s small but perfectly proportioned size, c) it holds my on the go quilting supplies or d) all of the above.
If you’d like to make your own see how below.
You will need:
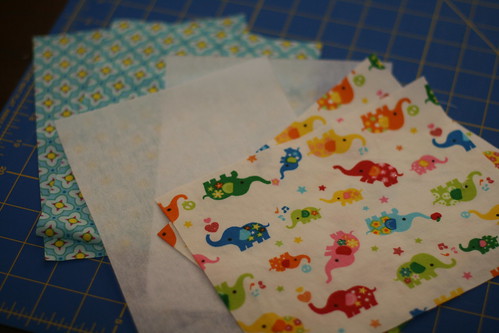
  • 2 pieces of exterior fabric measuring 8 inches by 6 inches. (The longer side will be the top of your pouch, keep this in mind when cutting directional fabric)
  • 2 pieces of interior fabric measuring 8 inches by 6 inches
  • 2 pieces of mid-weight woven non-fusible interfacing (This helps add body to your bag, because without it it wouldn’t be very “boxy”"
  • 1 12 inch zipper
  • Coordinating thread (this will be visible on the outside of the bag)
Things that will come in handy:
  • rotary cutter
  • cutting mat
  • shears
  • craft scissors
  • clear ruler
Step 1:
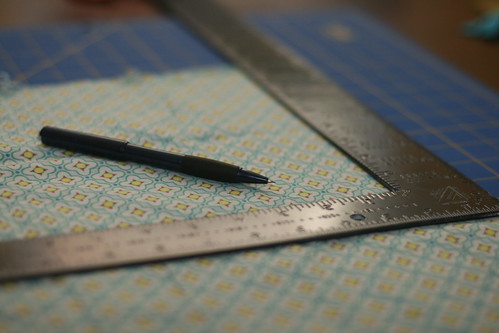
Choose and cut your fabric- is it just me or is this oftentime the hardest part?
canonjuly09 096
I like to use a right angle ruler (“borrowed” from my husband) to make sure my fabric pieces are nice and square.
canonjuly09 094
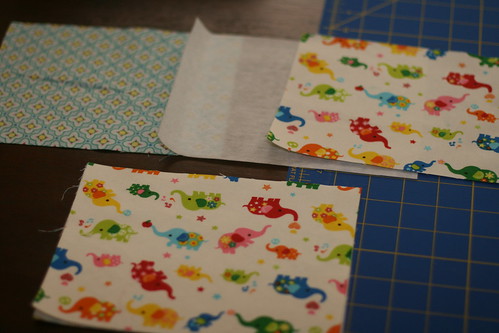
Step 2: Layer your pieces. Interior fabric right side DOWN, interfacing, and finally exterior fabric right side UP.
canonjuly09 097
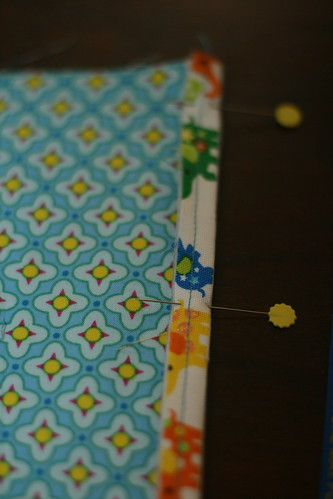
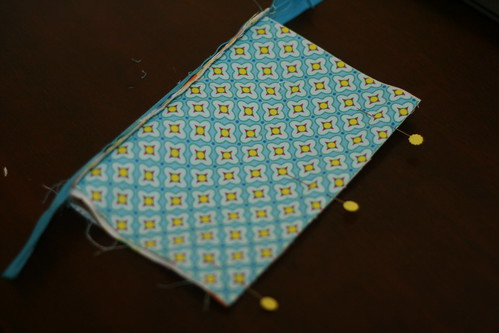
Step 3: Stitch the layers together 1/4 in from the edge. You can use a 1/4 in foot or the edge of your presser foot. These stitches will not be visible and are only done to hold the layers together for the next step. Fold the edges under 1/2 in and press.
canonjuly09 102
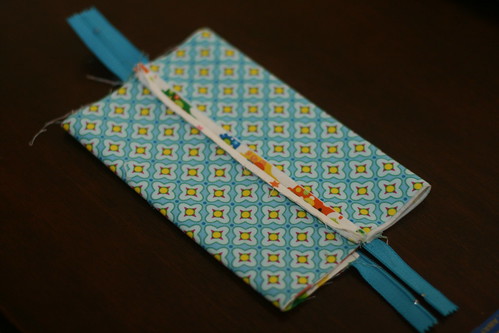
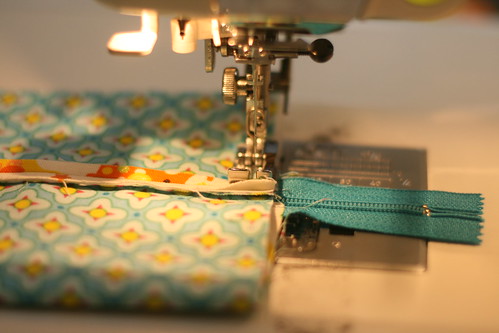
Step 4: Places both sets of fabric with the pressed under edges on top of the zipper and sew together.
canonjuly09 104
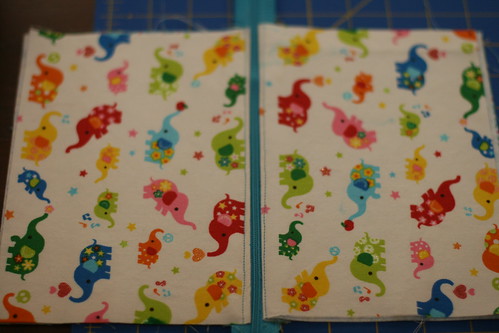
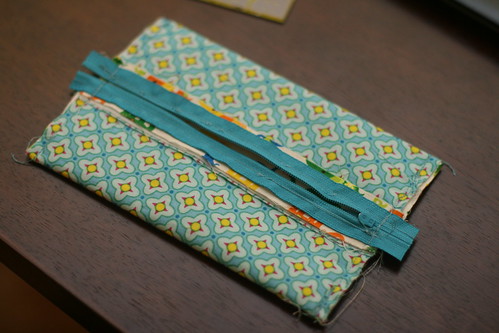
Step 5: Fold the two sides right sides of the exterior fabric together. The right side of your interior fabric will then be facing up. Stitch a quarter inch seam along the raw edge. I also suggest using shears to finish your seams so they don’t fray with use (I forgot to do this…)
canonjuly09 105
Step 6: Press the fabric tube you have created flat ensuring you have centered the bottom seam on the zipper.
canonjuly09 106
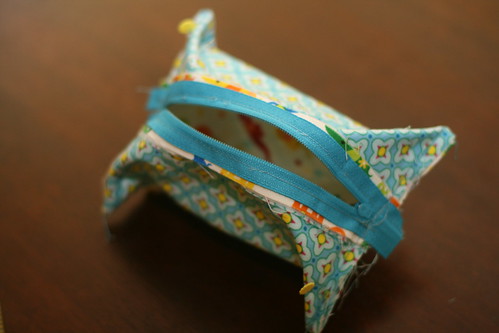
Step 7: Move your zipper pull to the center and stitch a quarter inch seam on both sides. Make sure you go over the zipper 2 or 3 times to secure it.
canonjuly09 107
Step 8: Cut off the excess ends of the zipper leaving about an inch from your seam.
canonjuly09 108
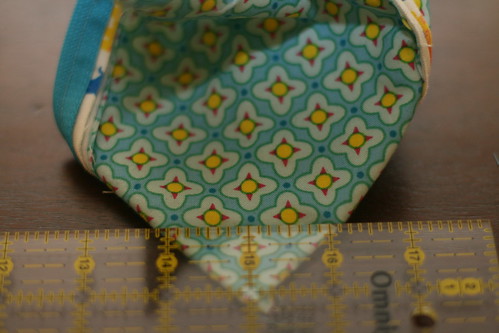
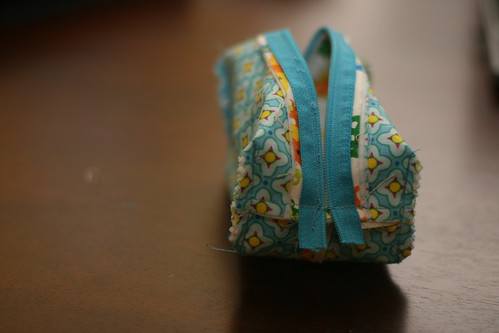
Step 9: Pinch the corners out to form triangles and draw a line one inch from the point and roughly two inches across. A clear ruler is key! Pin in place and sew across the two inch line on all four sides.
canonjuly09 112
canonjuly09 113
Step 10: Use your shears to cut off the excess fabric. This reduces the bulk and finishes your seam in one step.
canonjuly09 114
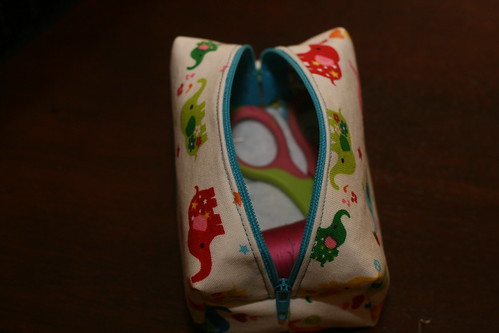
Step 11: Turn your pouch and admire your handiwork!
You can fill it with on the go sewing essentials like I did.
canonjuly09 117
Or use it as a change purse, first aid kit, on the go toy “chest,” cosmetic case, candy bag, etc


Lined, Zippered Pouch / Make Up Bag


This morning I was in a rush to make a simple lined make-up bag and had a quick look on the internet to see if I could easily find any dimensions for such a thing. I could find instructions on how to make a pouch, but none with dimensions and none with covered ends to the zips, which is how I like my zips to be finished. It now seems quite illogical to me that I decided that I simply must write a tutorial for such a thing when I was meant to be 'rushing'...but it seems that most things can wait. So here we have a lined, covered zip ends make up bag / coin purse tutorial (for personal use only, see tutorial end for other terms). Photos are plentiful and instructions (hopefully) basic, in the hope that a beginner will be able to make this easily.

This make-up bag will end up measuring: 7.5" x 5".

Here are the ingredients you will need:
1 x zip (it can start off at any size, but should be cut down to measure 8" exactly)
2 x lining - 8" x 5.5"
2 x fancy fabric for outer - 8" x 5.5"
2 x fancy fabric zip end covers- 3" x 1.5"
4 x sew-in interfacing - 8" x 5.5"

The interfacing is optional...but I think that as this will probably be used in a handbag (rather than on a dresser) it should have some substance to it and not be prone to wobbling around like a blancmange...don't say I didn't warn you!
Yay! You decided to use the interfacing - you won't regret it! Take a piece of the interfacing and attach it to one of your 8" x 5.5" rectangular pieces by zigzagging all the way around the edges. The do the same for your other 3 rectangle pieces. This makes them more manageable and less flappy to work with later on. Now set these to one side.
Take one of the 3" x 1.5" pieces of material. Fold it in half across the length and then fold back by a 1/4" at each end as above.
Place your zip so that it butts up to the half way fold that you made.
And then pin the ends down just like this. Then do exactly the same for the other end.
Now make two neat rows of stitching (it will show at the end so make it pretty) across the zip to secure your zip cover in place.
 So the ends should now look like this.
Now it's time to make a tasty fabric sandwich. Put your outer fabric face up. Place your zip on top of this face down. Now place your lining on top of this face down. Pin it so that the top of the zip and the top of your fabrics are all perfectly aligned...don't worry, your zip end covers will be higher than the rest of this...just pretend they're not there!

Pull the zip open halfway. Put on your zipper foot and start at one end and begin to sew. With you finger gently feel for the zipper teeth and make sure your zipper foot presses up alongside these. When you reach the zip fastener keep your needle down and raise the presser foot and gently slide the zip backward a little before carrying one sewing.
 Once you've finished, flip the fabrics over so that they're the right way round. It should look like this. Your outer fabric and lining will now be touching wrong side to wrong side.

Now it's time to attach the fabric to the other side of the zip. Make your sandwich exactly the same as before, aligning the top of the zip with the lining and outer fabric and pretending that the first sandwich isn't there (almost as if you've eaten it). If you think you've got it sussed, don't look at the below picture as it can make your head hurt if you think about it too much...if you're struggling, eyes down:

So remember: Main fabric face up. Zipper facing down. Lining face down. Now sew! After you've flipped the fabrics round the right way it should look like this:


It makes sense to do some top-stitching on each side of the zip so that you're never faced with the horror of catching your fabric in the zip teeth and being left unable to reach any of the makeup or contents inside. Gently hold the lining and outer fabrics taut as you do this.
Mmmm...see how lovely this makes it look. Afterwards, when laid out flat, the lining side should look like this:
And the outer side should look like this. Scrumptious.

Now, it's time to stop faffing around with zips and start making your fabric into a make-up bag or pouch (eugh, such an unpleasant word).
Pull your zip open half way and leave it right there. Don't touch it again...no, really, don't touch it! Now hang onto the two pieces of outer fabric and put them so that the pretty sides are facing one another. The do the same with the lining: make the right sides of the lining face one another. Pin the outer fabric sides first, making sure that the edges of the fabric all match up nicely. Now pin the linings together, making sure that the zip ends are pointing downwards into the lining side and not into the outer fabrics side. Can you see on the picture above - my outer fabric is on the left and sits completely flat. My blue lining is on the right and has the zippy bits pushed to that side.
If you have a 1/4 inch foot then use this as your seam allowance guide...if you don't, then mark a 1/4" seam allowance all the way around the edge.
Sew right around the perimeter of the material (above, I'm halfway through), leaving a 2" turning gap in the bottom of the lining.
Nearly there now. Now it's time to de-bulk your zipper-end covers so that when it's all turned the right way out you don't get horrid lumpy bits. Take a fine pair of scissors (this is not the time for large shears) and snip carefully outside any lines of stitching to de-bulk wherever you can. Then make a little snip on each of the four corners of the square - again, being careful not to cut through any of your stitches.
Next turn it all the right way out through that 2" gap in the bottom of the lining that you left.
What a mess! Will this ever look right? Keep going....now aren't you so pleased that you didn't touch that zip and that you left it half-way open? Not doing so can cause the most undignified amount of expletives at this point, so it's really much better this way.
So now you're all turned out the right way out, but your corners look a little puckered, no (see below)? With your hand inside, between the lining and the outer fabric, use your fingers to poke it until it sits more neatly (I think a turning point is too pointy for this task and should only be used on the outer corners).
Keep poking....ahh, there, that looks much better, no?
Pull the lining out a little, fold the turning gap in the lining inwards and sew up neatly. You're nearly finished, but the time for waltzing around the room, holding your beautiful new make-up bag aloft and singing is not yet upon us. Don't you remember how scrunched up all the fabric got when you were turning it the right way out? Delay the gratification and get thee behind the ironing board for you still have work to do!
With the lining out (because if you leave it in it will get ironed into horrible creases), first iron the outer of the case and then the inner.
Then put the lining back into the bag and relax. If my pattern has gone according to plan and I haven't omitted a vital instruction, you should now be in possession of some pouchy loveliness (no, these two words will never really go together will they).
Now it's time for some chocolate...
http://flossieteacakes.blogspot.com/2009/05/lined-zippered-pouch-make-up-bag.html
Monday, April 30, 2012

How To Successfully Sell Your Product at Craft Fairs


Anyone who has any crafting skills can have a successful craft show. All it takes is a little know how.
Before I became a full time on-line retailer, I participated in a number of craft shows. Even then I operated my business from my home and the majority of "real time" interaction was with my children and husband. As a result, I found that I enjoyed the camaraderie that exists among craft peddlers and the interesting conversations with customers. It's a great way to get out and make money doing something you enjoy!
Of course, the first rule of thumb is that you have a craft. A craft doesn't have to be just candles, woodworking signs, or floral arrangements; a craft can be something you do regularly as just a hobby and never thought about turning into a cash-producing business.
For example, there are many of you out there that are talented in creating beautiful scrapbooking pages. People like myself, who aren't so gifted in that art and/or simply don't have the time to create those gorgeous keepsakes, are willing to pay a pretty penny for a pre-made page that requires only the insertion of photos and a couple of handwritten notations.
Everyone has the ability to create a craft project. And most of them are going to be pieces of work that many are willing to pay for. Looking for a craft idea or maybe something new to compliment an existing project? Try YouCanMakeThis.com for some really neat, simple ideas!
Now that you have your craft, it's time to market it!
One must first realize that there are two types of shows: juried and non-juried. If you are a new crafter, I would recommend that you begin with non-juried as the juried shows require submissions of the product (via photo or other methods) to be judged whether your item should be accepted for a space. However, if you have been crafting your product for some time and feel confident that you could easily pass inspection, feel free to choose either type show to enter.
Once you've made the decision for juried or non-juried, you must next locate craft fairs in your area. Google "arts & crafts fair" plus your state (or states you to which you are willing to travel) to find listings for shows in which you want to participate.
Since most craft shows offer 8′ x 10′ or 10′ x 10′ spaces, it's a good idea to practice setting up in roped or tape area the size of your space in your garage, basement, or any area large enough to accommodate. If your show is being hosted outdoors, make sure that your canopy will also fit into this space. (The most popular craft show canopy is E-Z UP from Van Raalte & Co., Inc.)
In arranging your display, one very helpful hint to remember is the use of levels is very eye-catching to potential customers. Simply laying your items out on a flat table surface is just plain boring. Use milk crates, small ladders, hanging hooks, etc.
Choose a theme for your space. Many craft fairs designate a theme such as Fall or Christmas. Whatever the theme, use an assortment of fabrics to drape across your tables. For example, for a Christmas theme you may choose to use a solid green fabric as your table cover then use white lace dollies to drape atop the green. Continuing with this theme, strategically place red tulle to create a swag to the front of your table. And don't hesitate to use decorations amid your products for sale. (Decorations should be clearly defined so as not to create confusion among buyers.) Just bear in mind that your coverings should be attractive, not overbearing; nor should they overpower your product. Simple, solid colors are best.
Next, you should organize. An easy example of this idea is candles. Arrange your candles by size. Pillar candles should not be mixed in with container candles. Floral scents should not be surrounded by bakery scents. In addition, if possible, use your product to decorate. Again, candles is an excellent example, in that you can take three varying height pillars (same scent is suggested), arrange them in a triangle atop a clear platter, and light (if permitted by show hosts) for a beautiful, eye-catching display.
Bottom line: think of your items as being placed in a grocery aisle. If there is no organization, your shoppers will wonder aimlessly and could possibly just walk away. In addition, include a nice assortment of products from the lowest price range to the highest for the best selling potential. With this methods, you catch most every budget! Complimentary products are also a great addition too (ie, candle lighters).
Now you need to create a sign displaying your business name. If there is information about your product (ie, soy wax vs. paraffin wax), this should be made onto a separate sign. If using more than one sign, be sure that the one with your business name is the largest. Pick up inexpensive, plastic sign holders at office supply stores such as Staples or OfficeMax. If you have a website or eBay store where you also sell your products, be sure to place business cards in holders in a couple of visible places for easy retrieval by customers.
Count on sticky kiddie fingers! Every show that I ever participated in was overrun with children. Since most craft show shoppers are mothers, this is to be expected. A great way to get mom's attention and keep grubby little paws off your delicate merchandise is to offer a cheap goodies basket. A great idea for a Christmas themed show is to purchase approximately 50 of the miniature stockings found at dollar stores. Along with the stockings, purchase several bags of candy. Fill each stocking with four to five pieces of candy and sell them for a dollar each. It's absolutely amazing how many sales can be created from such a simple idea. Even at the smallest shows, you'll be sold out of these "idle hand detractors."
Another good idea is to invest in a shirt bearing your logo and business name. Vista Print offers low cost screening printing for such an occasion. Many embroiderers can stitch your name onto a nice polo for a relatively low price. If you will be enlisting help for your show, be sure to fit them with a "company" shirt too for a professional, uniformed appearance.
The last idea is one that is purely optional. In an effort to gain contact with customers after the show, offer a raffle for one of your products. Provide slips of paper with pre-printed information such as: name, address, telephone number, email address, and the question of whether they would like to be contacted (via standard mail or email) about promotions, upcoming shows, and new products. Everyone loves a chance to win something and you will be surprised at how many people will feel obligated to mark "yes" in regards to contact; several will even become great customers! Just be sure to follow through with the raffle. If you have a website, be sure to post the winner's name to instill trust in your customers.
Now that you have all the technicalities out of the way....you're ready for show day!
Arrive at least one hour before scheduled opening time. This gives you the time needed to add finishing touches. You'll also catch those early birds who will undoubtedly arrive and anxiously began browsing booths.
If business comes in sprints, use the time in between to rearrange and/or restock. You can also take this opportunity to discreetly eat a quick lunch or snack.
Most importantly, have fun. Smile. Be friendly. Your craft show is sure to be a success!

Monday, February 27, 2012

Turning Your Hobby Into Crafting Income - pros, cons, tips & tricks for income through crafting


Where To Start???

The first thing you need to remember is - just because you thought of it does not mean it will be a winner. Making money from your hobby or craft is more of a lifestyle than a viable income source for most people. That is because most people enjoy crafting (sporadically) rather than dedicating the majority of their week to cranking out items for sale and end up having to market them as well.

First , you need to test the waters. Go to some craft shows and see what people are selling. Go early and stay awhile then go back near the end and see who is still hanging out. Check them out carefully to see if they are packing up a lot of merchandise or if they have a significantly smaller inventory than what they came with. Flea markets are good for this as well.

Second , check out things of interest to you on the internet as well as what is "hot". If what you want to sell is not in demand you may need to modify either your urge to become your own boss or change what you are willing to make &/or sell (just because you want to sell it does not mean there is a large market for your item). -- Here I speak from experience. You have to remember that what you are selling today, this week, this month or this year may not or more likely will not be popular the next week, month or year from now. Another point of concern is you can't make just one of an item unless you are making high-end, high cost items that do not necessarily turn over very fast (which is not good if you are trying to establish income from your 'handiwork'.

Third , you have to be willing to dedicate your time to it as if it were your full time job. Even if you are working full time and trying to get started. Making money from something you create means you are the factory, salesperson and CEO. I do not want to discourage you, rather to get you prepared for what is to come.

I sold my crafts for years on e-bay but only as a hobby or in-between jobs. I also sometimes sold my crafts at school and park craft shows. Each one has their own flavor and clientele base. If you are blessed with children that are interested in making the same types of things, there are things they can do to help, but in the grand scheme of things you are also quality control. Give them jobs they can do without having to denigrate their efforts.

Fourth (& final), life is supposed to have flavor, challenges, hardships, fun, and sometimes failure. If you take the flavor and taste it for yourself, seek the challenges, ride out the hardships, laugh, love and sometimes fall down, but always get up then you will gain so much more than the knowledge of life. You will take the essence into yourself and send it right back to others.

So, You Are Still Ready To Proceed?

Ok, so, you want to do it anyway, sucker! No really, I applaud you in your effort.

Your options are varied.

1. If you want to target craft shows: You should set up a schedule of small goals to accomplish prior to the date you need to show your wares. Everything you want to sell must be made prior to arriving at the craft show/fair. (Remember that you may/will not sell everything that day.)

As you attend more and more shows you will see what is in demand, what sells well on a regular basis and what is not selling well at all. You should always cater to what is popular while still remaining true to your inspiration. In other words, if you don't like making it don't chose to sell it, even if it is a money maker. You don't want to get yourself away from the job you don't love now just to get yourself into a situation you can't fire yourself from! You will keep telling yourself it is for the money. However, nothing in life is worth torture if you can't enjoy your life. If you end up eating spaghetti more often than not but are comfortable and satisfied, isn't that better than eating Fillet Mignon but dealing with a stomach ulcer?

2. If you want to target internet sales, make sure you are aware of the variables. Lets say you make an item that is all of a sudden very popular. You need to make sure you have a good source of supply (stuff you use to make your crafts) and keep yourself supplied, or set a cap on stock so that once it is gone it is no longer available.

What I used to do is make something and have enough supply to make a few more (say 5-10) of that item. If it sold quickly I could refill my supplies and make more. Usually if you say you will ship within 2 business days make sure you have enough time to make the quantity you are offering and get it shipped out. Also remember you are not offering one item only. Make sure you don't overlap item production. This means that if it takes 4 hours to make 5 total of one item and 2 hours to make 5 total of another item and you need to make 4 different variations of it that is 12 total man hours. So, don't list the entire quantity as in stock & as ships in 24 hours. If the best happens and they all sell all of a sudden, guess what? You are staying up with your friend, 'Monster', and working your hinney off to get them ready to ship! That is what the CEO does, make sure the production is accomplished. Guess what? you are the CEO, Head of Production, and Factory Staff!

If, however, your items did not sell quickly, leave them in inventory and promote them later or stop them and featured them as 'close out items' at a later date. You can always set up an auction for quick sale as limited quantity 'buy it now' items. Usually you can pay one auction fee for an individual item or multiples of the same type of item (showing variations) so why not offer them all for the one low fee?

p.s. auction fees are a 'cost of business' which is deductible on your income taxes. Having to sell something at a reduced price is a 'business loss'. Do you see where I am going here? Don't worry about how much you are losing now if it will lower your taxes at the end of the year. **Remember that I am referring to filing long form, Schedule C, not a short form. Even if it is classified as a hobby you cannot file 1040A or EZ. Definitely speak to your tax professional and keep all your records on external hard drive. You can always print them out if needed.

Let's Wrap This Up!

Ok, as the title says, "Let's wrap this up!"

Make lists! Take notes! Write down your goals!

Make an outline of what you want to do and when. Forecast a budget. It will not be accurate, but can easily be revised and help you with achieving your goals. Get a journal or start an Excel spread sheet. List all your income in one column and all your expenditures in another column.

Take a hint from someone who has been in the trenches. If you don't know how much money you have or don't have you will soon feel discouraged. Highlight anything that can be deductible. This will help you see how having to sell something at cost or a loss now is not always a bad thing at the end of the year. (Show yourself the full selling price, the sold at price and the difference as business loss) Don't get lazy, keep those records up to date! No matter how awesome your memory is, once you start to multi-task on a daily basis you will not remember what that receipt in your coat pocket was for unless you record it the same day! Your enemies are stress and lack of sleep. Take time every day to do something with your family or for yourself if you are by yourself. Absolute satisfaction is the key to your happiness!

How to Start a Home Design Studio or Craft Room


If you own a business that designs, creates, and sells handmade items from your home, or even if you just love to put your hands and mind to work, it is likely that you need a studio that intrigues your imagination, inspires you to create, sets your mental gears turning, and provides a tidy and accessible craft space for working. The photos and suggestions below will get you thinking and dreaming about starting your own home design studio.

Fancy Craft Workspaces

Most important is that you fill your space with things you love. Cut out scraps of fabric that inspire you, newspaper clippings or color swatches that caught your eye; save photographs, postcards, antique advertisements, nameplates, greeting cards, bits of texture from your garden. Have a bulletin board or two at eye level that will give you plenty of eye candy when your ideas run low. These bits of paper and string put together by Design Sponge would inspire me; what about you?

Surrounded by Flights of Fancy...


Organize Your Craft Space

The most functional design spaces are usually stacked floor-to-ceiling, on at least one wall, with shelves of supplies. Two or three small boxes can usually fit on a shelf, and can be slid out easily to get to the contents. Supplies that you use more frequently should be at arm's length or in drawers near your working space. Spools of threads, ribbons, or wires can be placed on a peg board on the wall nearest your work table, and tools such as scissors, pens, and knives can stand up in a small container. The design studio for PinkLovesBrown paper goods and fine items is a great example of an organized storage space and inspiring design studio in one!

My favorite kind of work space involves lots of sunlight, and plenty of lamps for when it gets dark. There is occasionally something inspiring about a dim atmosphere, but as for working with colors and textures and details, natural light is the best thing that can come into your craft space! Don't ruin your eyes for the sake of creativity. Pull back those curtains, let in the sunlight, and you can be sure your designs will look their best in any lighting.

Another advantage to having a window near your workspace is the view outside. Whether you live in a woodland or a city, you will appreciate a look out the window now and then to get fresh ideas from what you observe of the great outdoors. The Bark Design work studio by the Bark Design Architects combines the best of the work environment with the best of the outdoors: plenty of natural light, views of the coast, and the workroom itself elevated amongst the treetops. How would you like to work in a place like this?
Create Your Own Design Studio in an Abandoned Chocolate Factory!

An art studio can appear out of the strangest places! Helen Rawlinson, who designs and creates textiles for home decoration use, has found the perfect place for her studio: an abandoned chocolate factory in London! Built in the Victorian era, this building was bought recently by another designer, then rented out to specific crafters like Helen. She has each wall piled high with shelves and products, little toys underfoot from her son, and when she needs a break, she takes a few steps out into a cobblestone courtyard surrounded by potted plants. It sounds idyllic, doesn't it?

Your Craft Table and Chair

A clutter-free table is a must for all crafters, because the clutter only increases as you work --which it should! As a wise man said, "Where no oxen are, the trough is clean, but much increase comes through the strength of the ox." Your clutter should be your increase, not your demise. Choose a desk or table that offers you plenty of space without crowding your hands or the square footage of your room. You need to be able to move around freely from supply shelves to workspace without bumping into corners of tables or cabinets. A great way to have add-on desk space is to attach slide-out extensions to one or both sides of your desk or table. You can easily adjust the surface area of your desk according to your needs.

Decide if would rather work standing up or sitting down. John Adams nearly always composed his documents and letters while standing up, and he had to have a special desk tall enough for him to write while standing. Now many people have admitted they work better while standing (or even pacing), and there are several desks and counters for the stander/pacers. If you prefer to sit, consider getting a stool or an exercise ball to improve your posture and strengthen your back. Your chair should be high enough to let your forearm rest on the desk without overextending it or crunching it in to your side. You should also be able to keep both feet flat on the floor or foot bar of your stool or desk.
 

Copyright © 2008 Green Scrapbook Diary Designed by SimplyWP | Made free by Scrapbooking Software | Bloggerized by Ipiet Notez